If you're as interested in cake as I am (I know you are), you've probably seen many variations of the movie-cake, where a talented decorator creates a realistic popcorn bucket out of edible materials--none of which are actually popcorn.
I decided to try my hand at this for my aunt's birthday/Oscar night party this year. In the past, I'd decorated some very elaborate cakes for my dear Aunt Sittrea, including a book cake and a tea set cake. I was excited to try my hand at making this cake, and even though it looks simpler than the other two I'd made, it had it's own set of challenges.
The finished product looked like this:
First I needed to make the popcorn, which in the end, was my favorite part of this cake!
I started with a bag of mini-marshmallows and, after some experimentation, discovered that cutting them into clover shapes gave them the most realistic look. If you are hoping to try this, be sure to clean the knife frequently so it doesn't get gummed up; this tears the marshmallows rather than slicing them. I added a dab of watered down food gel along each one and let them sit out for a day to get stale so they weren't so squishy. I made about two cups of them, which took a while, but was worth the effort!
Next I had to bake and stack the cake for the bucket. I used four six-inch rounds.
I measured the cake and estimated how tall and wide to make the strips of red and white fondant around the bucket and put them on over the "dirty icing" layer. I also added a plaque of sorts to be the front label of the bucket.
This label was my biggest problem and my biggest disappointment. I should probably have traced or used a stencil or something to compensate for my sloppy handwriting. My first attempt looked pretty bad and I ended up removing the plaque and making a second one.
Here's the first one:
The second was better, but not stellar. Lastly I adhered the popcorn to the top of the stacked cake with icing and painted it with yellow food gel as butter.
I think the Oscar party-goers appreciated the cake and I keep learning every time I try something new!
A smattering of thoughts for animal-lovers, Seattleites, word nerds, Celiacs, travelers, and probably your mom.
Sunday, March 10, 2013
Movie Popcorn Bucket Cake
Aardvark, Bird and Gifraffe Wall Art
If you don't work at a zoo, (and even if you do) you probably have never heard a pregnant woman say, "I'm planning on decorating the nursery with an aardvark theme." But if you're me, this was hardly unexpected. My brilliant and kind friend Sara is due to give birth to a baby in April and I wanted to make her some aardvark art to adorn the nursery walls, since aardvark art is not easy to come by.
This was an incredibly easy project that turned out so well I made some more for myself. I simply bought two pieces of scrapbook paper with complimentary colors, modified an aardvark drawing I found to make a template, and cut out the form of the aardvark from the solid colored-paper.
The framed result:
I liked the aardvark, but for my bedroom I wanted some custom bird art, so I found a drawing I liked and made a stencil of two birds on a branch. Add frames found on clearance at the craft store and...
I have two pieces of art with exactly the colors and patterns I had in mind to brighten the walls!
Before I made the aardvark, I had tried the same technique for a wall-hanging to go with my giraffe-print electrical panels. I liked how it came out and will put it up, but I think using a darker solid color would have made the giraffe print pop more.
This was an incredibly easy project that turned out so well I made some more for myself. I simply bought two pieces of scrapbook paper with complimentary colors, modified an aardvark drawing I found to make a template, and cut out the form of the aardvark from the solid colored-paper.
The framed result:
I liked the aardvark, but for my bedroom I wanted some custom bird art, so I found a drawing I liked and made a stencil of two birds on a branch. Add frames found on clearance at the craft store and...
I have two pieces of art with exactly the colors and patterns I had in mind to brighten the walls!
Before I made the aardvark, I had tried the same technique for a wall-hanging to go with my giraffe-print electrical panels. I liked how it came out and will put it up, but I think using a darker solid color would have made the giraffe print pop more.
Merman Cake
Maybe it's a reflection of my personal style, or maybe the friends I choose, but occasionally I get requests for really odd cakes. For instance, this anteater cake I did last November.
This time the cake was a merman cake for my friend Tom. He loves really tacky merman ornaments like these, which inspired my artistic pal Adam to suggest a merman cake for Tom's birthday party. I insisted that Adam collaborate with me on the project and this is what we ended up with.
Genius. I can't take credit for the parts that are impressive, such as the illusion of rock hard abs or the cute cowlick in the hair-do, but I will admit to making all of the sea creatures, only some of which are visible from this angle.
My favorite is the octopus.
In the next post, I'll demonstrate that I have more strange friends (aardvark nursery art?!)
This time the cake was a merman cake for my friend Tom. He loves really tacky merman ornaments like these, which inspired my artistic pal Adam to suggest a merman cake for Tom's birthday party. I insisted that Adam collaborate with me on the project and this is what we ended up with.
Genius. I can't take credit for the parts that are impressive, such as the illusion of rock hard abs or the cute cowlick in the hair-do, but I will admit to making all of the sea creatures, only some of which are visible from this angle.
My favorite is the octopus.
In the next post, I'll demonstrate that I have more strange friends (aardvark nursery art?!)
Friday, December 7, 2012
Anteater Cake
For my most recent foray into cake decorating, I was challenged to make a cake for one of my co-workers whose favorite animal is an anteater. I considered making a cake with a fondant anteater on top, but decided to up the ante and make a cake that was actually shaped like an anteater. This was my first cake that was not cake-shaped.
I practiced a few techniques the week before the party and ended up with what appeared to be a seamonster on the counter. I diagrammed how to make two 8-inch rounds into a body, tail, head and neck so I could replicate the proportions. I also baked the cake differently so it would be dense and easier to work with, like sponge cake.
The body piece below is comprised of one 8-inch round cut in half and glued together with icing. I also thinly covered it in chocolate icing.
For the tail piece, I cut out most of the edge of the second 8-inch round in two pieces and stacked them.
The head and neck are wedge-shapes cut from the remainder of the 8-inch round I used for the tail pieces. The proportions here are a little off because of the size of tray I needed to fit the anteater onto. I think the head should actually stretch out more to the left.
I used semi-circles from the second 8-inch cake for legs and covered him in fondant except for the tail. When I covered the head I created an extension for the nose that is all fondant with no cake underneath and tried to smooth out the seam. Then I made facial features from black fondant. I think my favorite part of this cake is the adorable ears!
I put a stripe down the anteater's back with a strip of black fondant and then I added fur (after much experimentation attempting to approximate the color gray) using a decorating tip intended for making grass. If I were more ambitious, I could have covered the whole body, but I decided to be more of a minimalist because the coloring in the icing gave it a funny taste (also it would have taken forever).
With the addition of tiny ants and a red tongue (all fondant), he was starting to at least marginally resemble a giant anteater, which was about all I could hope for, since it was my first "shaped" cake.
Hopefully I'll have a reason to continue expanding my repertoire of decorating techniques with more cakes that are this fun!
I practiced a few techniques the week before the party and ended up with what appeared to be a seamonster on the counter. I diagrammed how to make two 8-inch rounds into a body, tail, head and neck so I could replicate the proportions. I also baked the cake differently so it would be dense and easier to work with, like sponge cake.
The body piece below is comprised of one 8-inch round cut in half and glued together with icing. I also thinly covered it in chocolate icing.
For the tail piece, I cut out most of the edge of the second 8-inch round in two pieces and stacked them.
The head and neck are wedge-shapes cut from the remainder of the 8-inch round I used for the tail pieces. The proportions here are a little off because of the size of tray I needed to fit the anteater onto. I think the head should actually stretch out more to the left.
I used semi-circles from the second 8-inch cake for legs and covered him in fondant except for the tail. When I covered the head I created an extension for the nose that is all fondant with no cake underneath and tried to smooth out the seam. Then I made facial features from black fondant. I think my favorite part of this cake is the adorable ears!
I put a stripe down the anteater's back with a strip of black fondant and then I added fur (after much experimentation attempting to approximate the color gray) using a decorating tip intended for making grass. If I were more ambitious, I could have covered the whole body, but I decided to be more of a minimalist because the coloring in the icing gave it a funny taste (also it would have taken forever).
With the addition of tiny ants and a red tongue (all fondant), he was starting to at least marginally resemble a giant anteater, which was about all I could hope for, since it was my first "shaped" cake.
Hopefully I'll have a reason to continue expanding my repertoire of decorating techniques with more cakes that are this fun!
Sunday, November 25, 2012
Beach Cupcakes
I haven't had much time to do any elaborate cake projects lately, but for my mom's birthday earlier this month, I did manage to throw together some cute beach cupcakes. There are similar cupcakes all over the internet so I had no shortage of photos for inspiration.
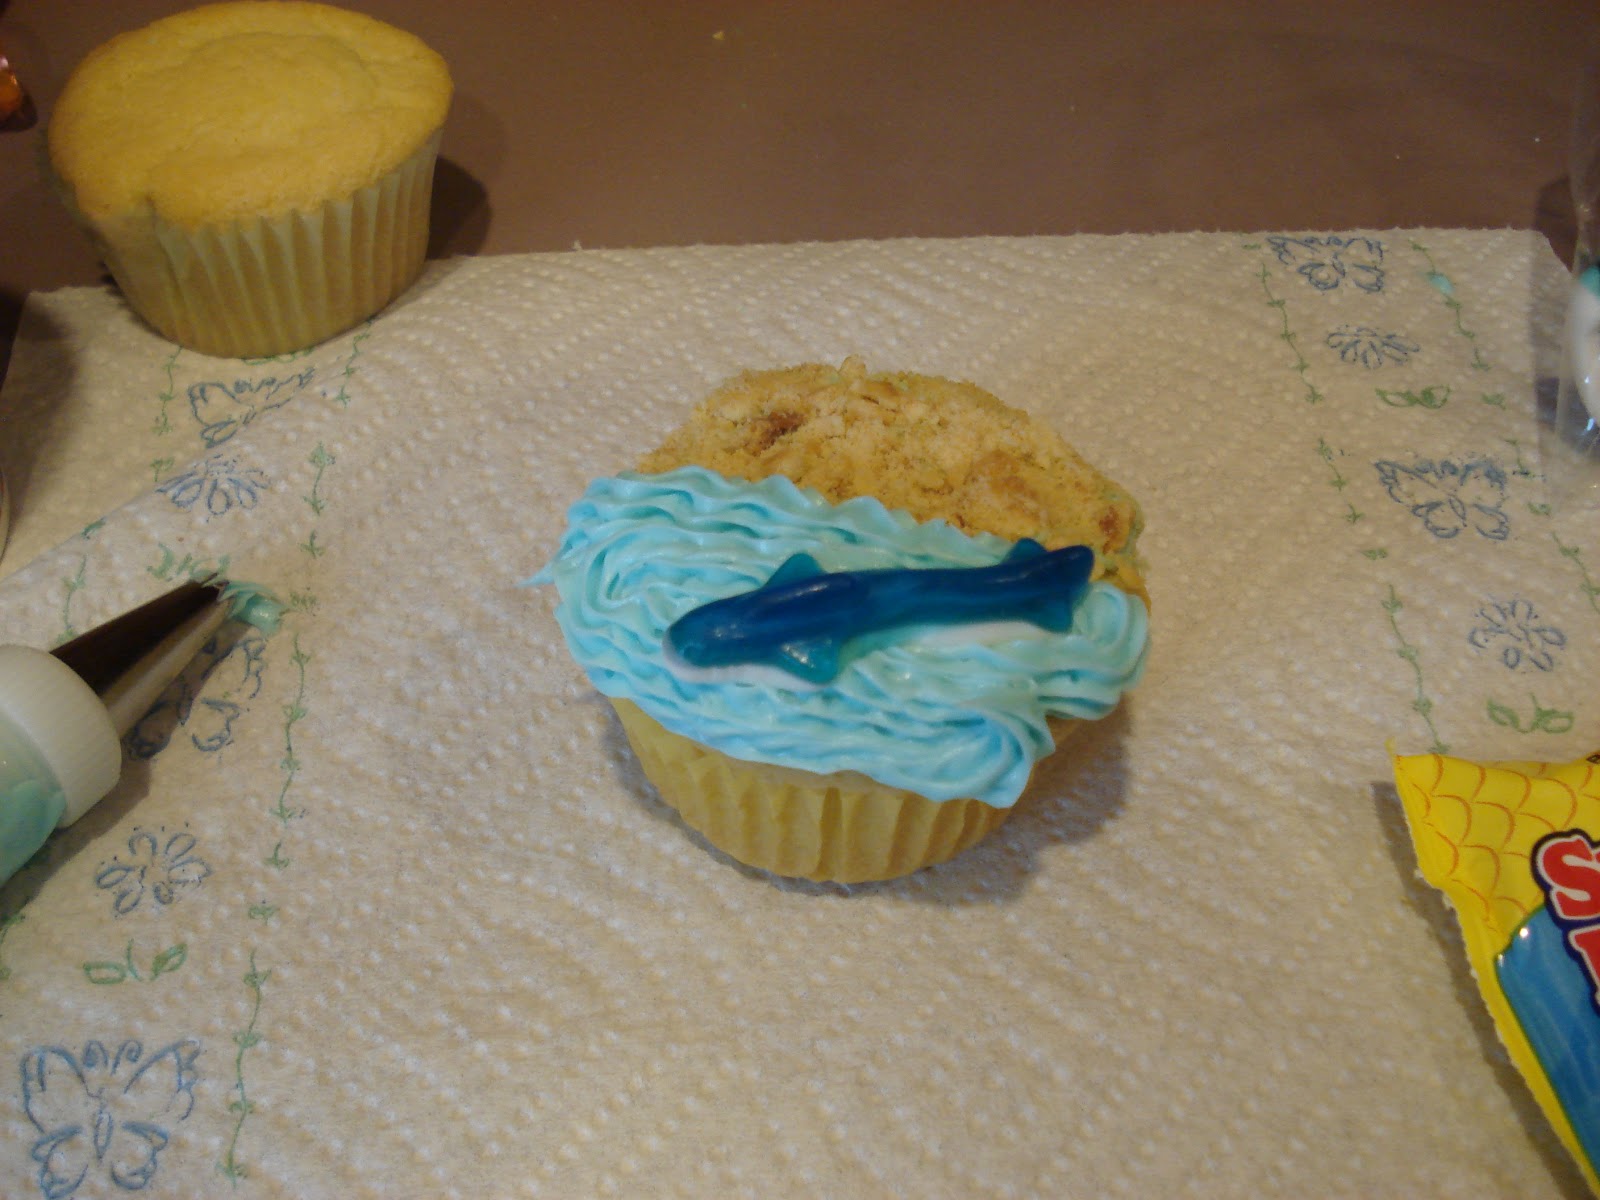
Making this batch of cute cupcakes was actually pretty simple. First I baked some gluten-free cupcakes and gathered my supplies.
I used a gluten-free cake mix to bake the cupcakes and went the easy route with the icing and just bought some Pilsbury blue frosting instead of coloring it myself. I put a little smear of the icing on half of the cupcake and then rolled it in smashed up gluten-free animal cookies.
After the "sand" was glued on, I added the ocean part of the cupcake using a closed star icing tip to make swirls. Gummy sharks and Swedish fish served for tasty sea life. Cocktail umbrellas gave these cupcakes the finishing touch.
Making this batch of cute cupcakes was actually pretty simple. First I baked some gluten-free cupcakes and gathered my supplies.
I used a gluten-free cake mix to bake the cupcakes and went the easy route with the icing and just bought some Pilsbury blue frosting instead of coloring it myself. I put a little smear of the icing on half of the cupcake and then rolled it in smashed up gluten-free animal cookies.
After the "sand" was glued on, I added the ocean part of the cupcake using a closed star icing tip to make swirls. Gummy sharks and Swedish fish served for tasty sea life. Cocktail umbrellas gave these cupcakes the finishing touch.
Monday, November 5, 2012
DIY Custom Electrical Panels
My previous home improvement blog post involved "sewing" and painting some curtains to cover my closet, which have turned out to be a wonderful investment of time (just a few hours) and money (just a few dollars!)
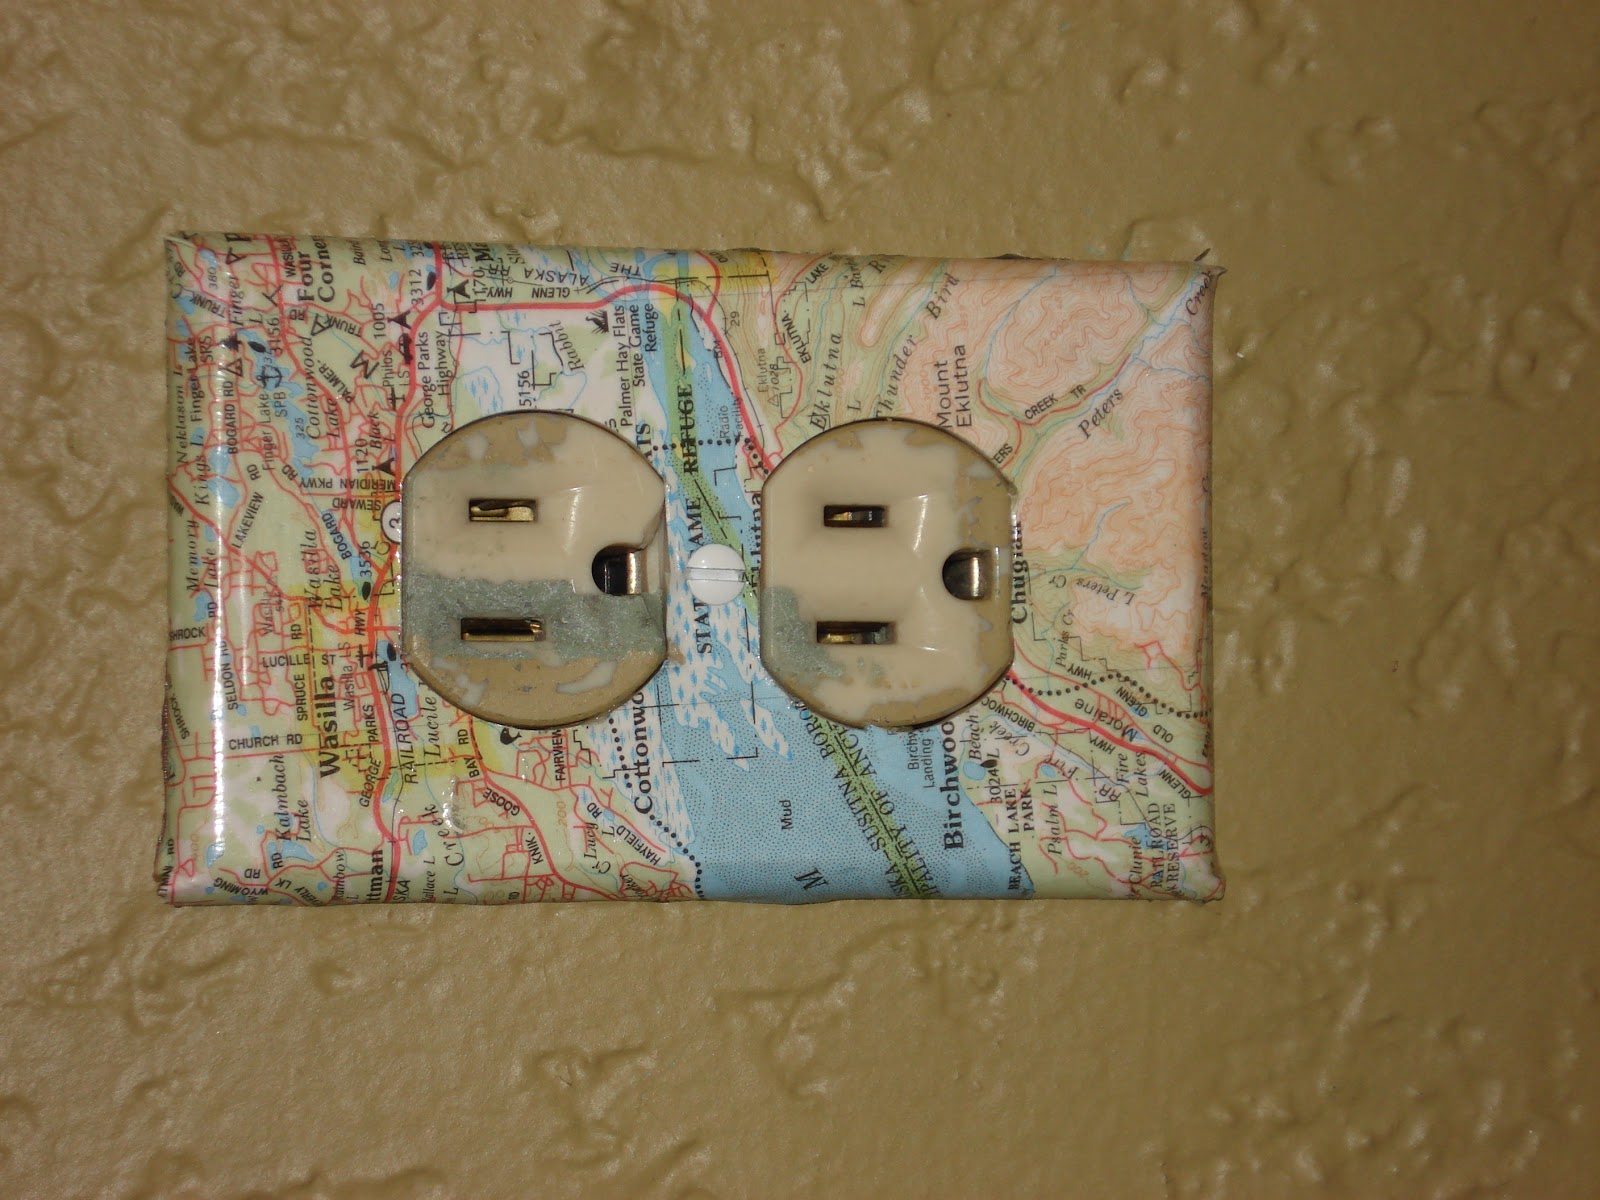
Now it's time for another frugal and fun home improvement project: custom electrical panels. Because we (okay, I) chose a theme for each room in the house, I've been toying with inexpensive ways to unite the furnishings and decor while conveying the theme. Also, because we did a lot of painting and tearing down sheet rock, many of our electrical panels ended up stacked on various counter-tops.
For our travel-themed room, I used some pages of maps from an atlas of Alaska that I bought for a dollar at an estate sale. I traced around the panel and adhered the map to the panel with decoupage glue. Then I used a craft knife to cut out the space where the plug-ins go through or the light-switch flips up and down. Lastly I covered the maps with a few layers of the same glue and sprayed a clear sealer over the top.
Voila!
I used the same method to create some panels for one of the spare bedrooms where I've decided to have an owl theme.
The cute owl wrapping paper came from World Market, and I used the same paper to add some pizazz to an old Ikea bookcase.
I also covered the panels in the hallway bathroom in a giraffe print to match the tile and mirror:
The living room downstairs is going to be outer space themed, but I wasn't able to find paper that satisfied me, so I painted them with acrylics.
I'm hoping to do more of these fun (and easy) decorating projects, and I'll try to keep up with blogging about them!
Now it's time for another frugal and fun home improvement project: custom electrical panels. Because we (okay, I) chose a theme for each room in the house, I've been toying with inexpensive ways to unite the furnishings and decor while conveying the theme. Also, because we did a lot of painting and tearing down sheet rock, many of our electrical panels ended up stacked on various counter-tops.
For our travel-themed room, I used some pages of maps from an atlas of Alaska that I bought for a dollar at an estate sale. I traced around the panel and adhered the map to the panel with decoupage glue. Then I used a craft knife to cut out the space where the plug-ins go through or the light-switch flips up and down. Lastly I covered the maps with a few layers of the same glue and sprayed a clear sealer over the top.
Voila!
I used the same method to create some panels for one of the spare bedrooms where I've decided to have an owl theme.
The cute owl wrapping paper came from World Market, and I used the same paper to add some pizazz to an old Ikea bookcase.
I also covered the panels in the hallway bathroom in a giraffe print to match the tile and mirror:
The living room downstairs is going to be outer space themed, but I wasn't able to find paper that satisfied me, so I painted them with acrylics.
I'm hoping to do more of these fun (and easy) decorating projects, and I'll try to keep up with blogging about them!
Thursday, August 30, 2012
DIY Painted Curtains
In an effort to rekindle the excitement of this whole home renovation thing, I tried some fun projects that I hoped would also add to the overall appeal of the house (without having to do ANY MORE washing, sanding, painting, etc.)
The master bedroom closet is very long and the previous owners had a curtain stretching over it, rather than closet doors. We'd taken down the curtains to paint and carpet the room and had been staring into the disarray of the 96 inch closet ever since.
I decided to make some curtains that would coordinate with the duvet cover I found at Bed, Bath and Beyond's clearance section for super cheap.
The duvet cover has a pattern with a silhouette of a bird on a branch, which I wanted to replicate on the curtain. I made a stencil by tracing the bird on tissue paper and then gluing the tissue paper onto cardstock. The result was this:
I bought a king-sized sheet which would stretch across the whole closet for 6$ from Goodwill. I cut the sheet in half and "hemmed" it using Stitch Witchery. This stuff is amazing! It's an iron-on adhesive that holds fabric together and is so much easier (for me) than sewing a seam!
Once I had two panels of blank canvas, I experimented with some spray fabric paint and a scrap of fabric to see if the stencil would work. I tried the spray paint, some acrylic paint and bleaching out the color to see what looked best.
The bleaching didn't work at all for this stencil and the fabric paint wasn't precise enough for the detail either. The acrylic paint with a small brush would have to do, though that was the most time-consuming option. I had to free-hand most of the design and I came up with it right on the spot, so I might have done something more organized like a repeating pattern if I'd known ahead of time what method would work with the stencil.
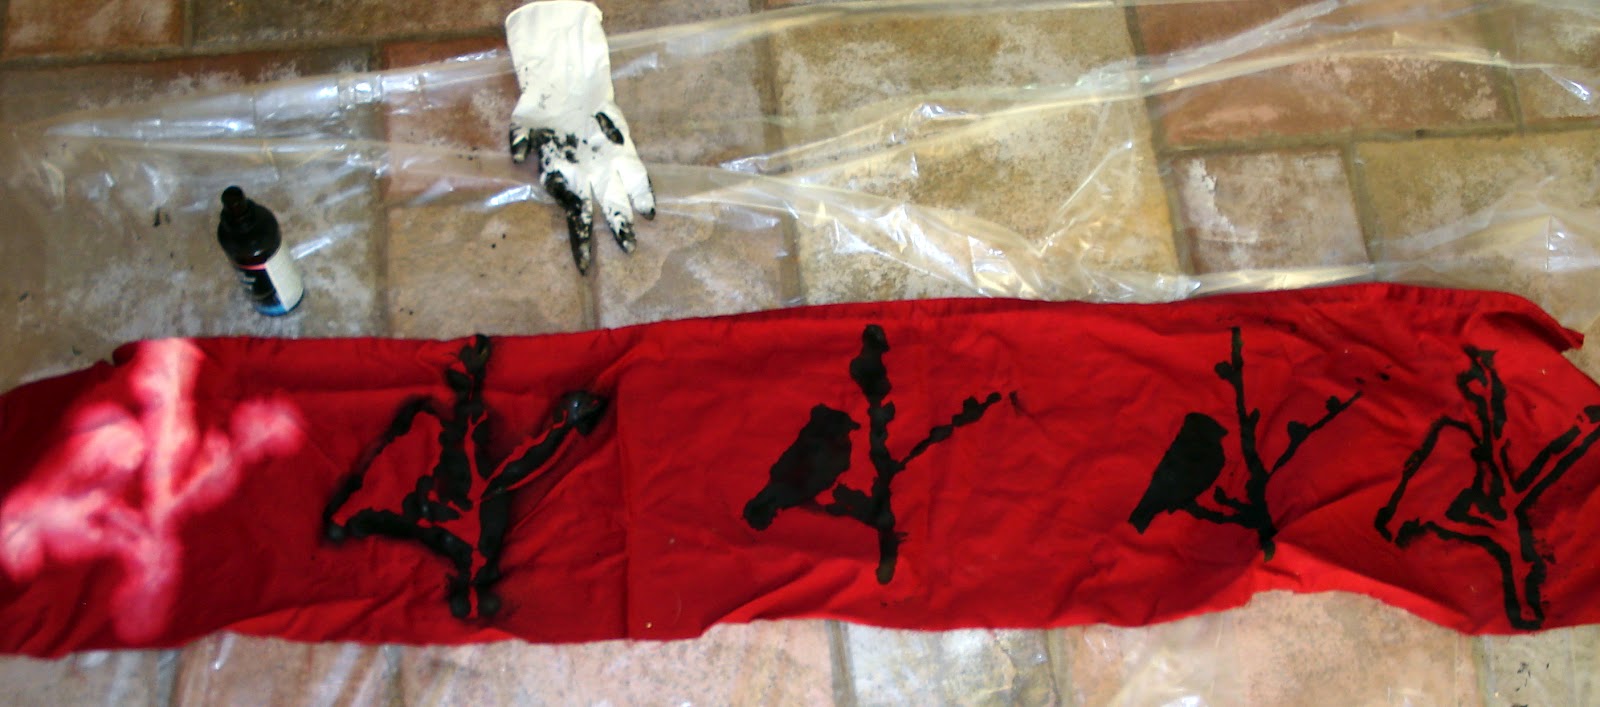
I started making a black tree with a mixture of the fabric paint and acrylic paint, but I had to pour the fabric paint out of its bottle and scrap the pump spray because it wasn't accurate enough:
I used the stencil for the birds, but otherwise free-handed this whole panel. Then I added the white accents.
For the second panel, I wanted a design to complement the first, but knew I could never replicate the whole thing. So I did this:
The white horizontal lines are just from sun streaming through the blinds. Sophie is inspecting my work as it dries.
When they were dry we hung them on a wooden rod that the previous owners had left us with.
Right panel:
Left panel:
Together:
Again, my photography skills are woefully insufficient, but in person the curtains look pretty good! The entire project took me probably around 8 hours, but it only cost about $12. Not too shabby.
The master bedroom closet is very long and the previous owners had a curtain stretching over it, rather than closet doors. We'd taken down the curtains to paint and carpet the room and had been staring into the disarray of the 96 inch closet ever since.
I decided to make some curtains that would coordinate with the duvet cover I found at Bed, Bath and Beyond's clearance section for super cheap.
The duvet cover has a pattern with a silhouette of a bird on a branch, which I wanted to replicate on the curtain. I made a stencil by tracing the bird on tissue paper and then gluing the tissue paper onto cardstock. The result was this:
I bought a king-sized sheet which would stretch across the whole closet for 6$ from Goodwill. I cut the sheet in half and "hemmed" it using Stitch Witchery. This stuff is amazing! It's an iron-on adhesive that holds fabric together and is so much easier (for me) than sewing a seam!
Once I had two panels of blank canvas, I experimented with some spray fabric paint and a scrap of fabric to see if the stencil would work. I tried the spray paint, some acrylic paint and bleaching out the color to see what looked best.
The bleaching didn't work at all for this stencil and the fabric paint wasn't precise enough for the detail either. The acrylic paint with a small brush would have to do, though that was the most time-consuming option. I had to free-hand most of the design and I came up with it right on the spot, so I might have done something more organized like a repeating pattern if I'd known ahead of time what method would work with the stencil.
I started making a black tree with a mixture of the fabric paint and acrylic paint, but I had to pour the fabric paint out of its bottle and scrap the pump spray because it wasn't accurate enough:
I used the stencil for the birds, but otherwise free-handed this whole panel. Then I added the white accents.
For the second panel, I wanted a design to complement the first, but knew I could never replicate the whole thing. So I did this:
The white horizontal lines are just from sun streaming through the blinds. Sophie is inspecting my work as it dries.
When they were dry we hung them on a wooden rod that the previous owners had left us with.
Right panel:
Left panel:
Together:
Again, my photography skills are woefully insufficient, but in person the curtains look pretty good! The entire project took me probably around 8 hours, but it only cost about $12. Not too shabby.
Subscribe to:
Posts (Atom)